
read
This guide is for everybody who is new to NEM. There are some important things you should know to keep your funds secure.
1 Basic Information 1.1 Your private keyWhen you saved the data for your NEM stake account, you were supposed to save 3 parts:
- the account address
- the public key
- the private key
It is essential to understand that the private key is the most important and sensitive part. Whoever has knowledge of a private key has full control over the associated funds. Think of your private key like a bank card + pin number together. If someone has access to both, he can access your funds. This is why you should keep it top secret but also never lose it. The public key is only needed to verify if your saved data is correct. You won’t lose access to your stake if you have lost your public key.
1.2 What is an address/account or a wallet?- The address is comparable to a bank account number. You can give it to people to let them transfer funds to you, but of course they won’t be able to access your funds.
- An account is comparable to a bank account. With NEM you can create as many accounts as you like for free in the same way you can have many accounts in one bank. To identify your account you can set a private label inside the NEM software, but to identify it to other people you need to hand them the account address. When you label an account, only you can see it.
- A wallet contains all your accounts. It should be protected by a strong password because it contains all the private keys of your accounts. Remember: Whoever has knowledge of a private key has full control over the associated funds.
To install the NEM software, please follow our guide.
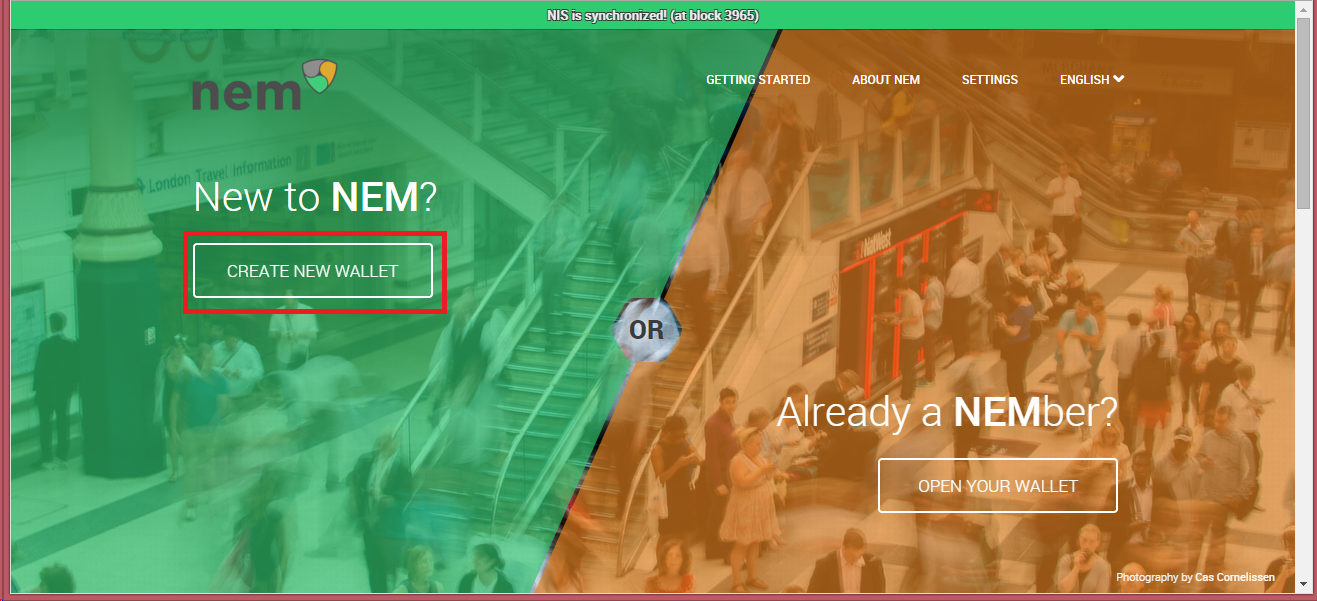
2.2 Create a walletVisit http://localhost:8989 to access the NEM Community Client and click "CREATE NEW WALLET":
Enter any desired wallet name, choose a strong password and enter it in the 2 password boxes to make sure you don’t misspell it and lose access to your wallet later.
Note: A strong password should consist of at least 12 characters. It is recommended to use numbers, capital and small characters and at least 1 special character (&, %, # etc.). Please also don’t use your year of birth or name inside your password. For more details, please take a look at this password guide: http://lifehacker.com/four-methods-to-create-a-secure-password-youll-actually-1601854240

If you forget your password, you will lose access to your wallet and possibly to the funds in your accounts if you don’t have a backup of the according private keys. Hence you should backup your password. We suggest to write it down on a piece of paper and put that to a safe place. (Where would you store gold coins?)
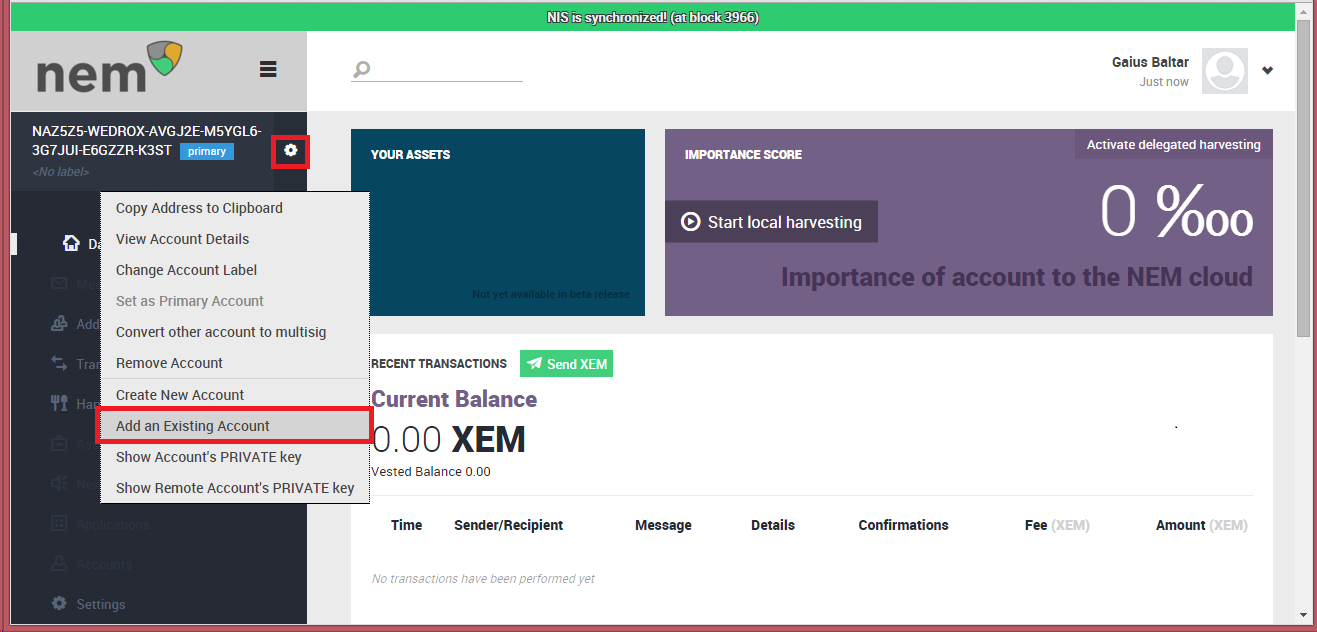
2.3 How to get your NEM stakeOnce inside of your wallet, you will see an account number in the upper left hand corner. Next to that account number is a gear icon. Please click on that gear icon and from the drop down menu select “Add Existing Account”.
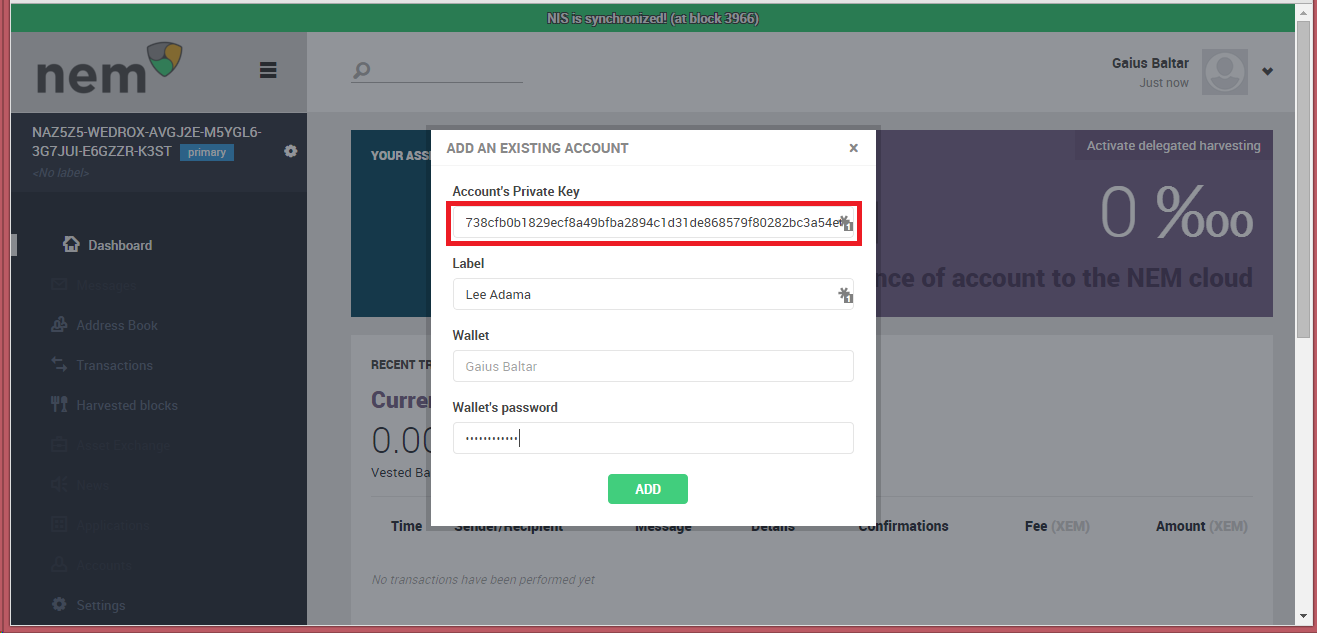
A pop-up window will be displayed. Now, recover your private key from the place it has been stored and enter it into the textbox called “Account’s Private Key”. Then enter a label so you can easily recognize your account later (in this example I chose “Lee Adama” but you can use anything) and then press “Add” after entering your password.
You will now see your account in the account list and your account balance on the right side. By clicking on your address you can see that you now have two accounts in your wallet.
Note: The account marked "1" in the screenshot above is your primary account. The account marked "2" is the one that you just imported. 2.4 Backup your wallet
Warning: There was a known error in the past versions of NEM and the following instructions did NOT work. From releases 0.6.42 on the back up wallet feature works.
Your wallet is basically a file on your computer. And since we know that every hard drive breaks (you just don't know when) a backup of your wallet is needed.
To do this click on the drop down arrow in the upper right hand part of the screen (next to your wallet name) and select “Export Wallet”.

You will now see a download with your wallet file in a zip compressed folder. Please save the zip file in a safe place (not your hard drive, but a USB drive e. g.). Remember: Without your password the wallet is useless.

Now that you have learnt the basics and you have imported your account, you will most likely want to start harvesting to earn even more XEM. Take a look at the Delegated harvesting guide to get started as soon as possible.
Trouble shooting: If you have any problems please try to read this guide first.
This is a companion discussion topic for the original entry at http://blog.nem.io/getting-started-with-nem/