This is first of a short series of posts. We will try to show how to create an environment to do AWESOME things 
In this part we’ll deal with prerequisites for further episodes.
The description is step by step, to allow even beginners trying it out.
Java
Let’s start by installing java.
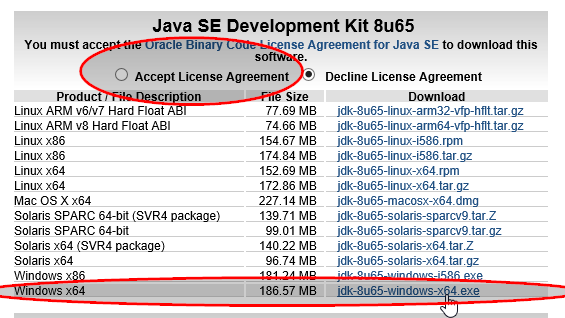
We’ll pick x64 Java Developement Kit (JDK). JDK automatically installs Java Runtime Environment (JRE).
Installation is pretty straightforward, it mostly consist of clicking, next, next, next.
JAVA_HOME
Unfortunatelly java installer won’t set JAVA_HOME environment variable, so we’ll have to do it manually.
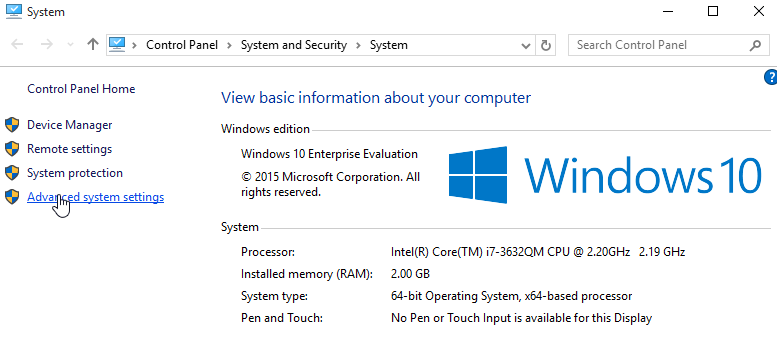
Start ‘System’ properties card (either from control panel, or by typing ‘system’ in search box)

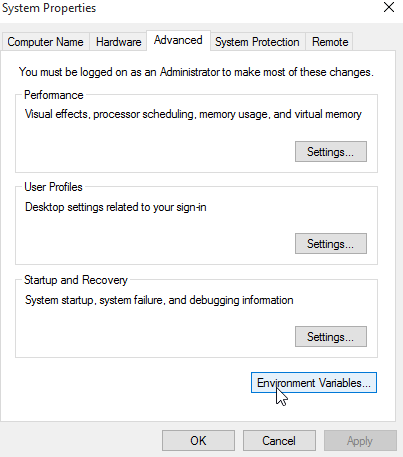
Choose “Advanced System Setting”
Card “Advanced” and at the bottom there is “Environment Variables”.
Click “New” under “System variables”. Variable name is JAVA_HOME, variable value is a path to JDK root dir (without quotes) C:\Program Files\Java\jdk1.8.0_65
Maven
Maven is versatile tool used in java projects.
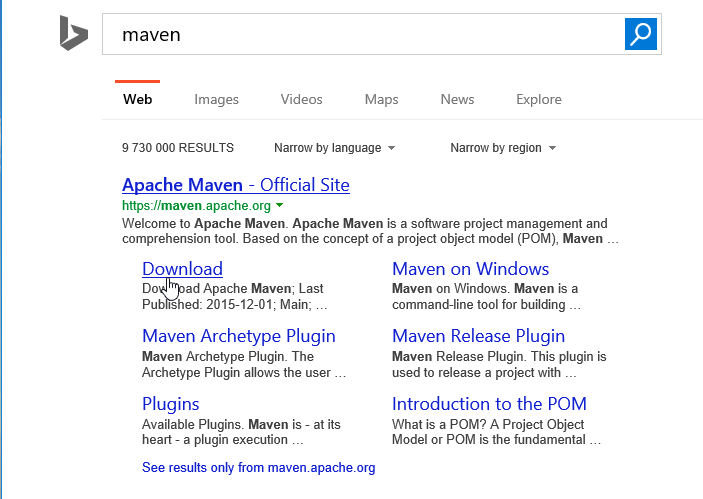
We’re gonna download maven as a binary zip archive.
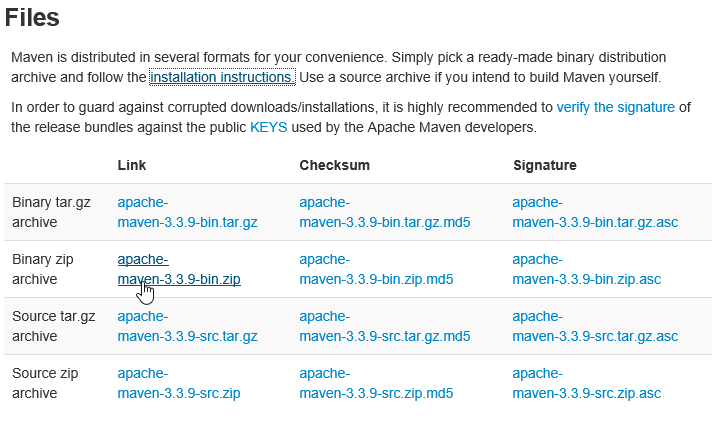
Extract the contens of a downloaded zip file into directory of your choice.
In our case this will be c:\tools\apache-maven-3.3.9
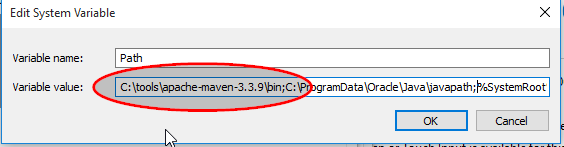
We’ll need to add maven binaries directory into system path.
Open up “Environment Variables” card, as described in previous step.
On the list of “System variables” find “Path” variable, and choose “Edit”

At the beginning of “Variable value” add path to maven bin subdirectory.
In our case: c:\tools\apache-maven-3.3.9\bin
Remember to FOLLOW the directory with a semicolon!
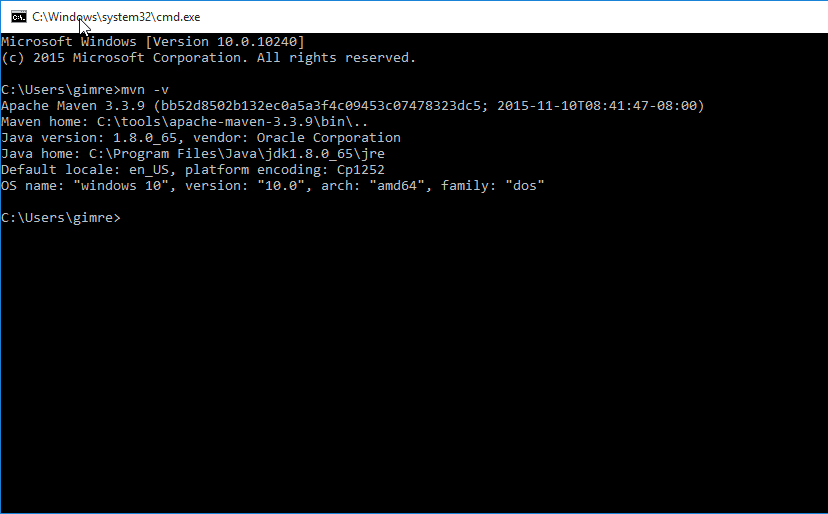
Start command prompt and verify, that mvn is working correctly, by typing:
mvn -v command
Git
It is possible to instal git alone, but under windows it’s suggested to install git along with git extenstions.
All releases are in gitextensions github page, download and run “SetupComplete.msi” version
On one of the pages chose to install both msysgit and kdiff
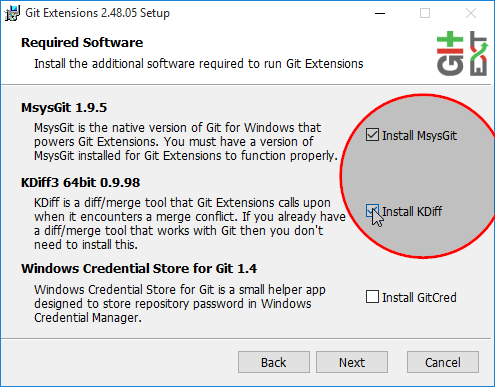
Installer will start installation of kdiff and git itself.
During git installation, we suggest to tick Windows Explorer Integration:
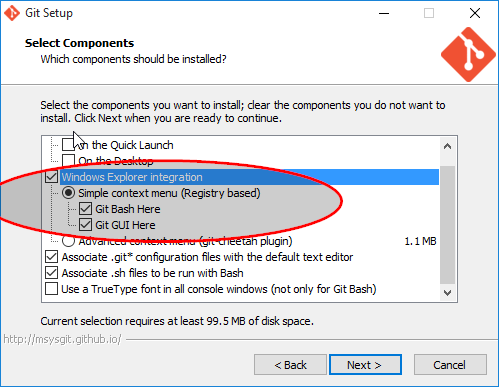
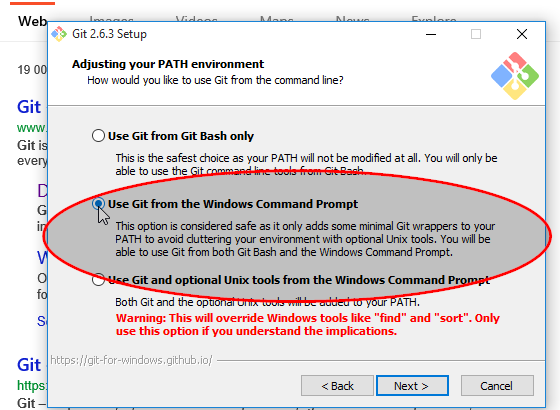
and on one of the following cards Use Git from the Windows Command Prompt (this makes things easier)
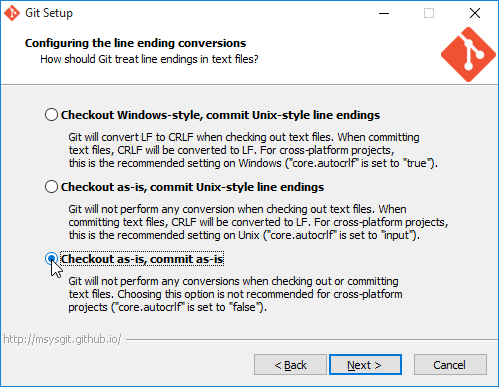
and on last card Checkout as-is, commit as-is, this is especially important
for projects where developers work on different OSes.
nem.core
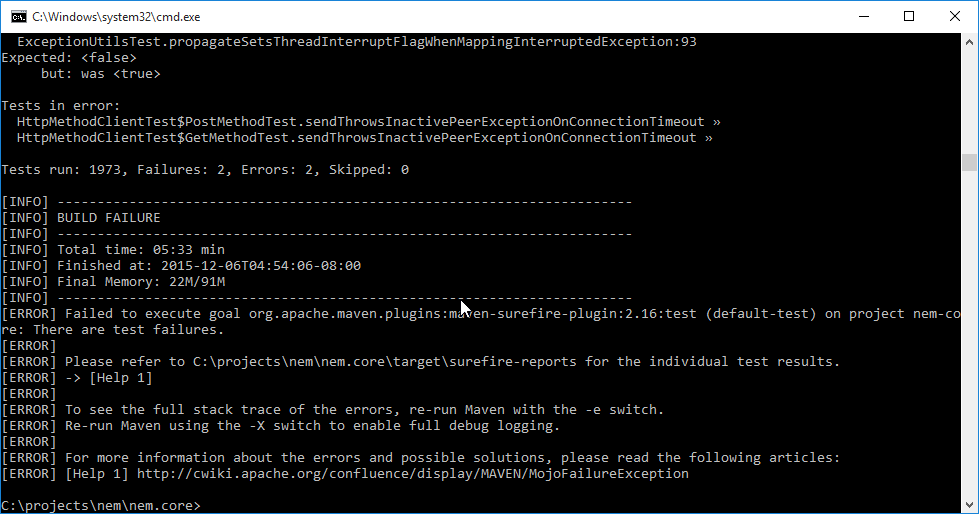
As a last step in this episode, let’s try to download and compile nem.core, to verify that installation succeeded.
First create some directory, where you will want to keep the source code, in our examples, this will be:
c:\projects\nem
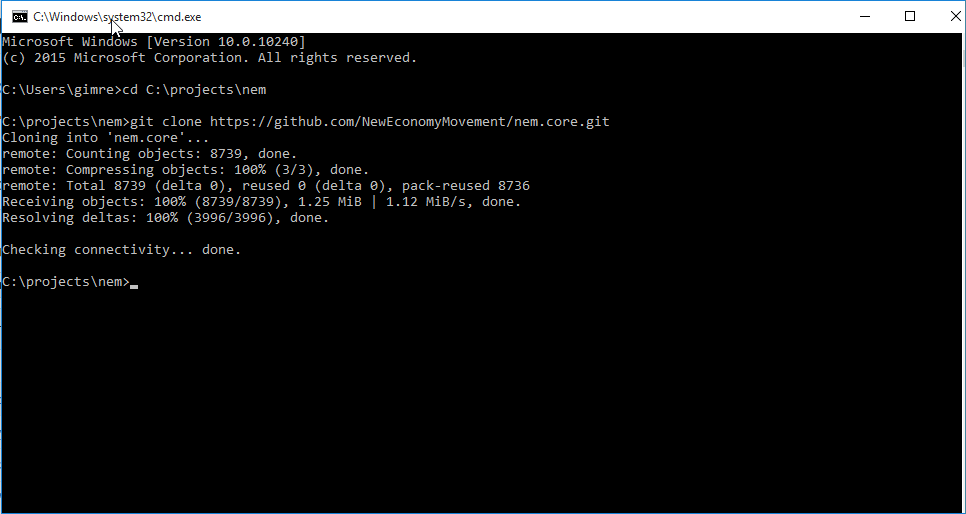
Start command prompt, change directory to created one and clone nem.core repository using command:
cd C:\projects\nem
git clone https://github.com/NewEconomyMovement/nem.core.git
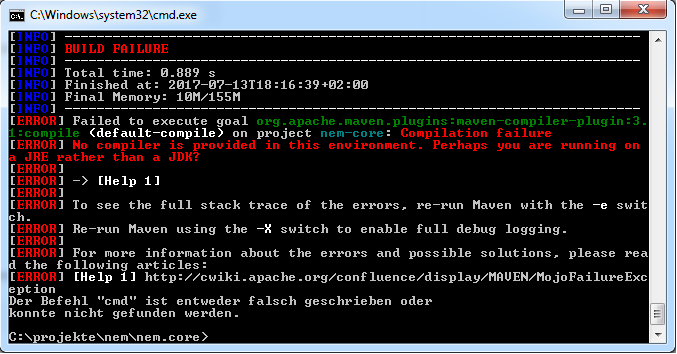
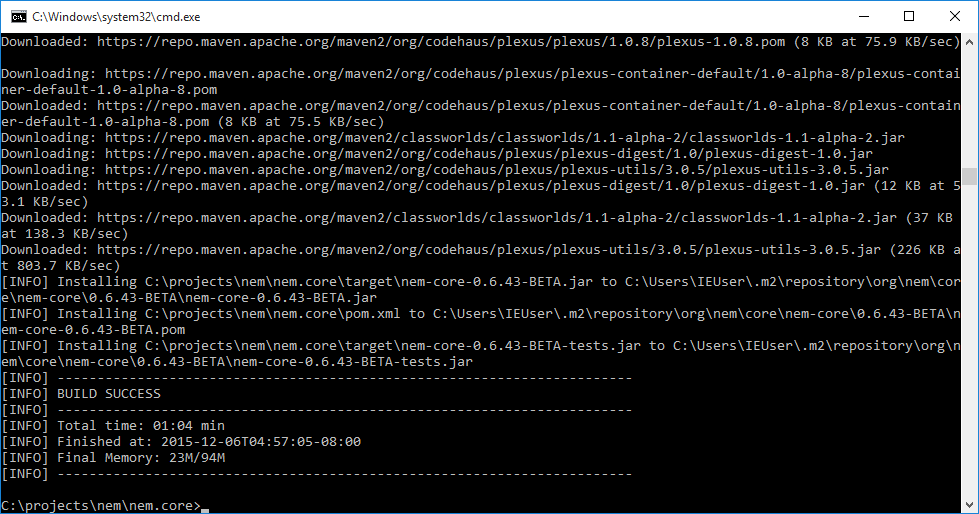
Still Inside the command prompt, switch to nem.core directory, and try to compile nem.core using commands:
cd nem.core
mvn clean compile install
This gonna take a while as it will first download all the dependencies and will also run all the tests.
There are two tests, that might occasionally fail, if that’s happen to you try compiling using command:
mvn clean compile install -DskipTests=true